A Winters Tale!
Page 3 – The Front Bits Continued
Fiddling with an FZX750
Next thing on the agenda was to order the front stainless steel braided brake lines from HEL so they were measured up and the order sent off. As usual great service from HEL, the lines were made and delivered within a few days. New handlebars were also needed, so a pair nice gold Renthals were put on order. In addition to that I had to decide on a headlight – was it going to be a twin or a single one? The brackets to hold what ever I decided on were sent for as well. Also on my shopping list were some new mirrors, I ended getting those form a local bike accessory shop. They were only cheapies, so after fitting I didn’t like the look of them and took them to make way for a more suitable pair.
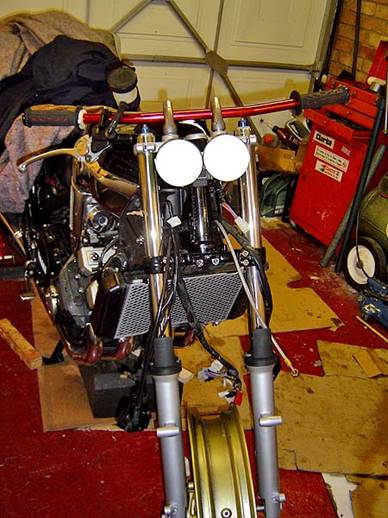
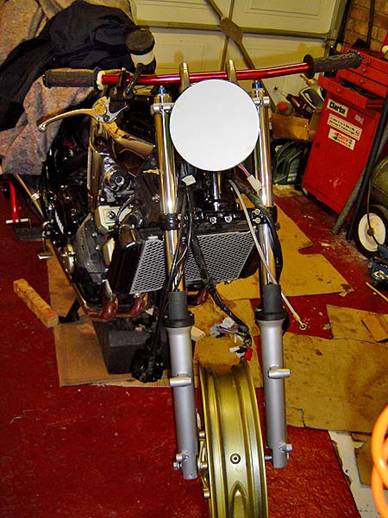
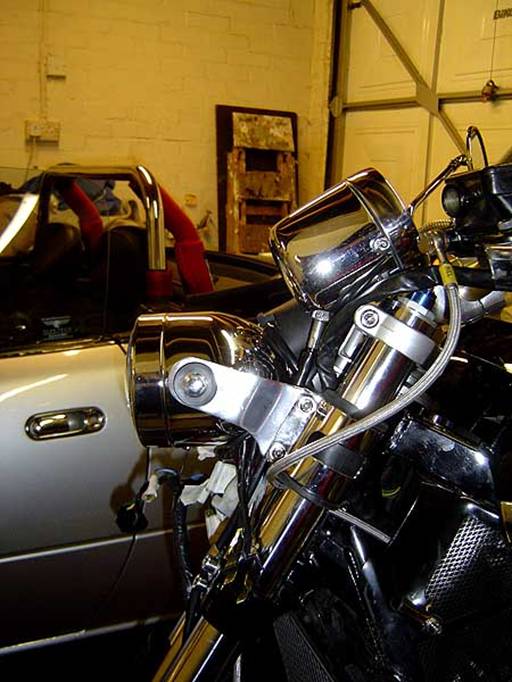
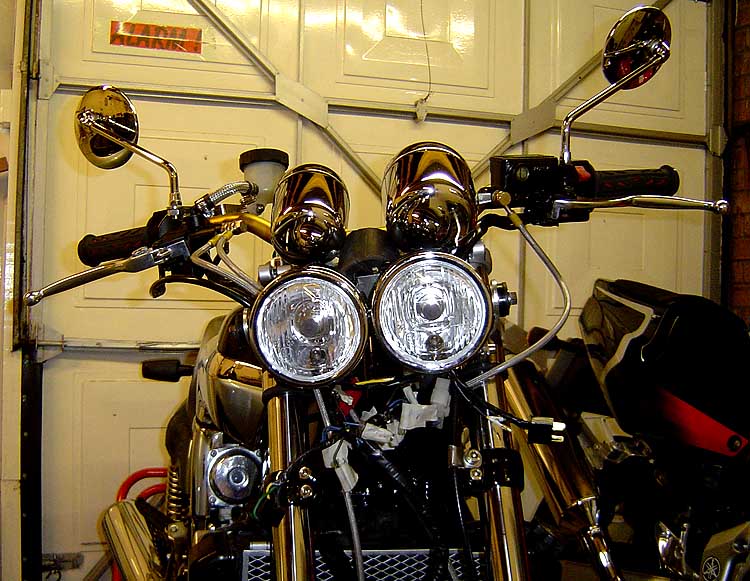
To decide which headlight would look best – twin or single, two cardboard cut-outs were made and taped to the bike. The twin cut-outs are slightly smaller than the actual size of the Dominator chromed light units, but it gave enough of an idea to make the decision to go for the twins rather than the single. Note the old flat bars are still on the bike at this stage.

Above: the headlight brackets fitted
A front brake lever and reservoir also had to be found, because the original FZX one wouldn’t have the power to operate the 4 pots of the blue spot callipers with 100% efficiency. Eventually I found a Thundercat brake lever / reservoir, but unlike the original FZX lever the T/Cat has a remote brake fluid reservoir, so a bracket had to be made up to fit that to the handlebars.
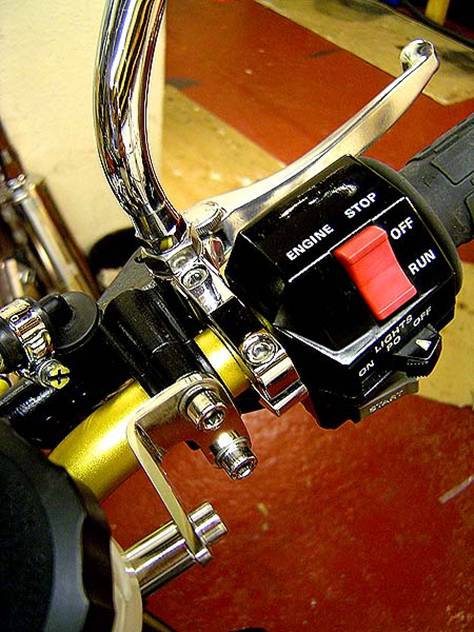
The T/Cat brake lever has no way to mount the R/H mirror, so a chrome clamp to fit the bars was bought after trying unsuccessfully to make a bracket to hold it. An XJR brake lever and master cylinder can be fitted instead of the Thundercat one, and is probably better because it has the mirror mounting hole in it. The problem is that XJR stuff is hard to find and none came up either on Flea Bay or the XJR owners club when I wanted one, so I had to go for the Thundercat one and a separate mirror mount
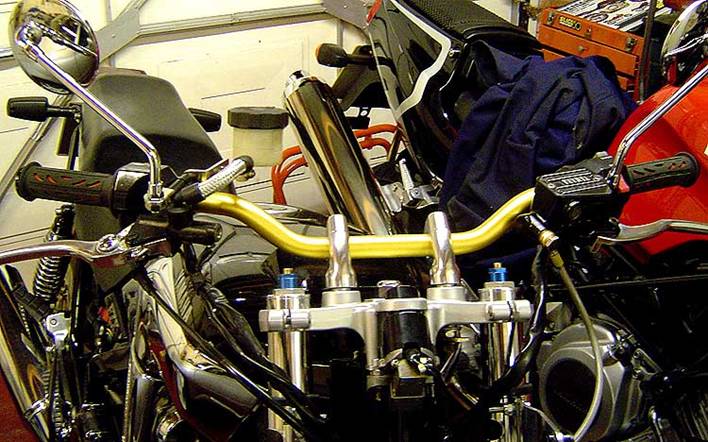
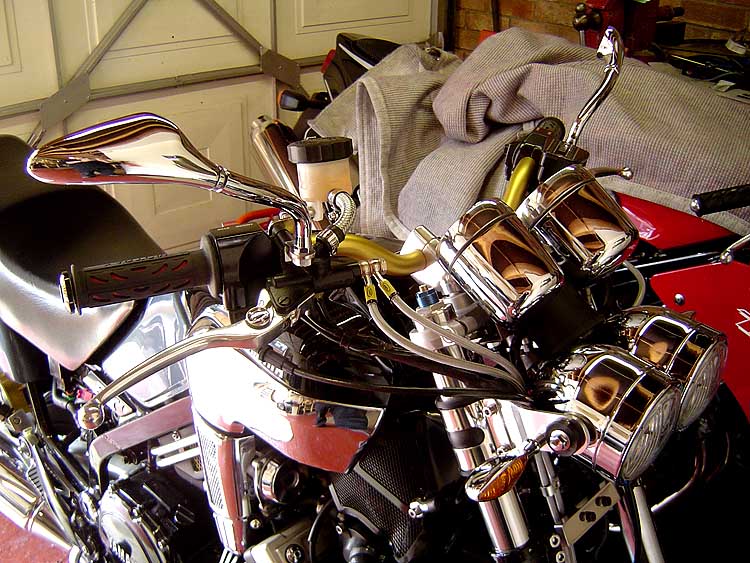
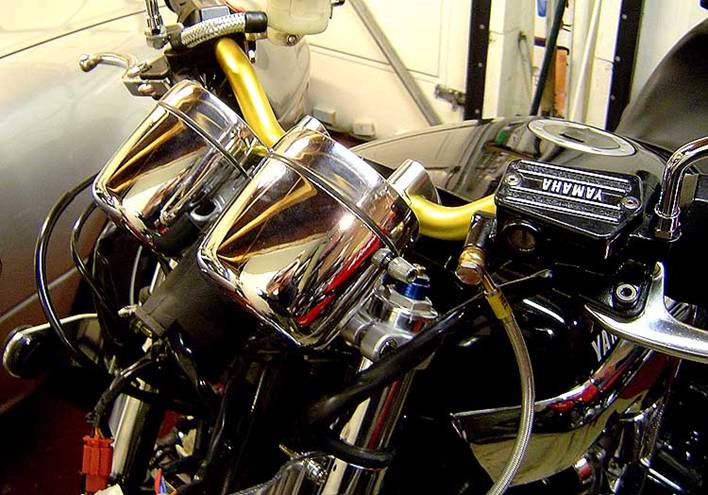
Above: the Renthal bars with the new round chrome mirrors which were taken off and replaced - I didn’t like them! The Thundercat brake lever and remote reservoir are also fitted at this stage. The rubber connecting hose to the reservior has been replaced with a stainless steel braided one
Below: the brake reservoir mounting bracket being made from 1/8” thick stainless steel. The photo after it shows it finished and on the bike.
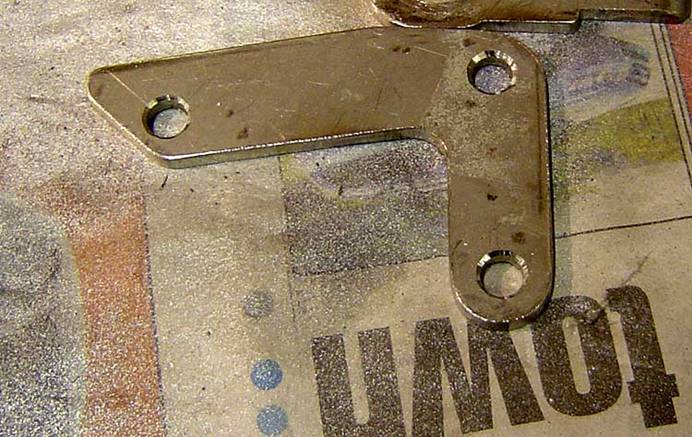
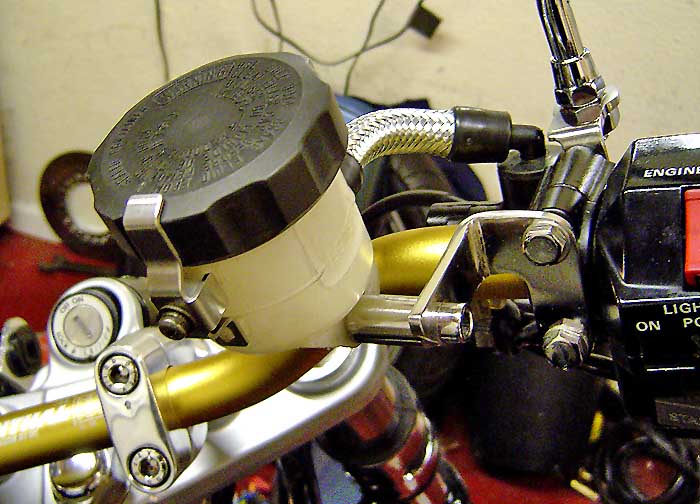
The shot above also shows the bracket I made for holding the mirror, this wasn’t a great success so it was removed and a clamp on mirror mount bought instead – shown below
I now had to find a way of attaching the speedo and tacho so ended up making some more stainless steel brackets to bolt them to. This was quite an awkard little operation, there’s not a lot of room under there, and because the twin lights don’t hide as much as the twins, everything had to be kept up and out of the way.
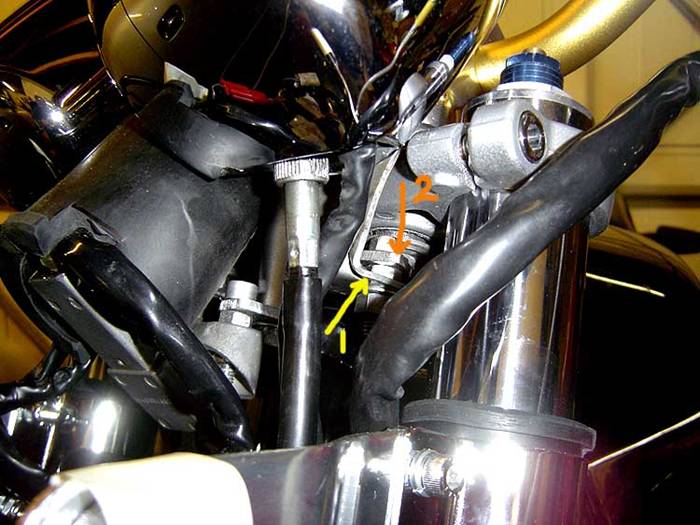
The small bracket made to mount the clocks can be seen in the above photo. The original speedo bracket is marked No1 and the home made stainless bracket is No.2. The Tacho mounting is exactly the same thing. Again these were Loctited in because they’re not in the most accessible of places to get at if they decide to come loose!
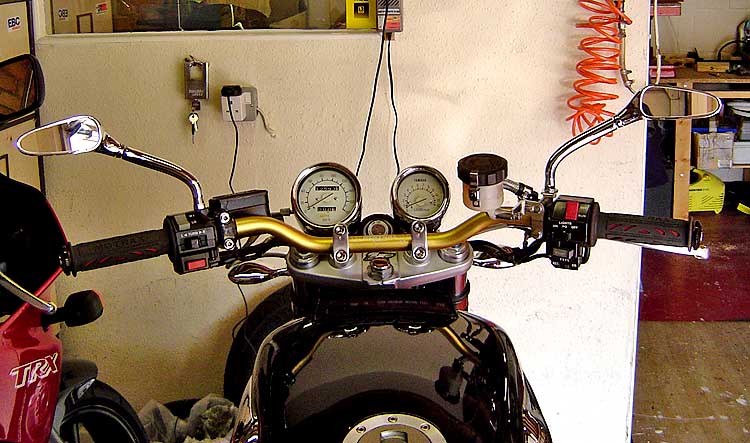
Below: the clocks back on the bike.
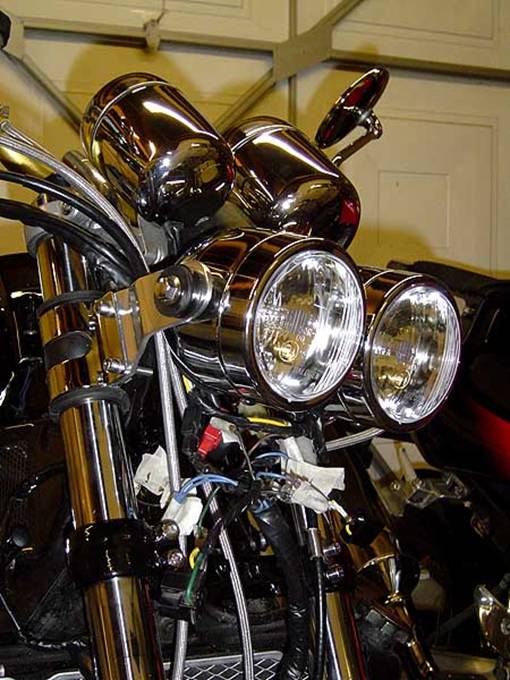
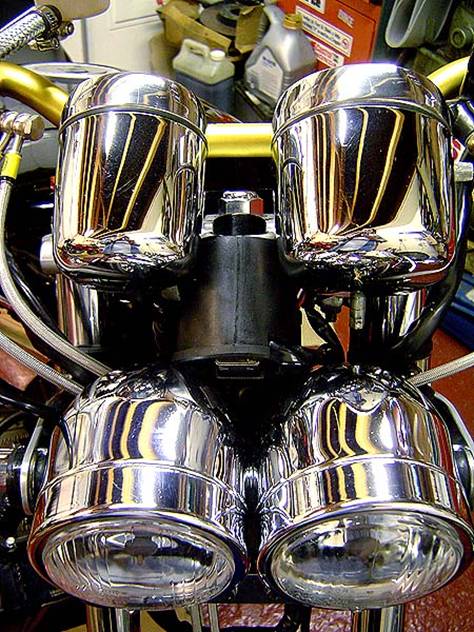
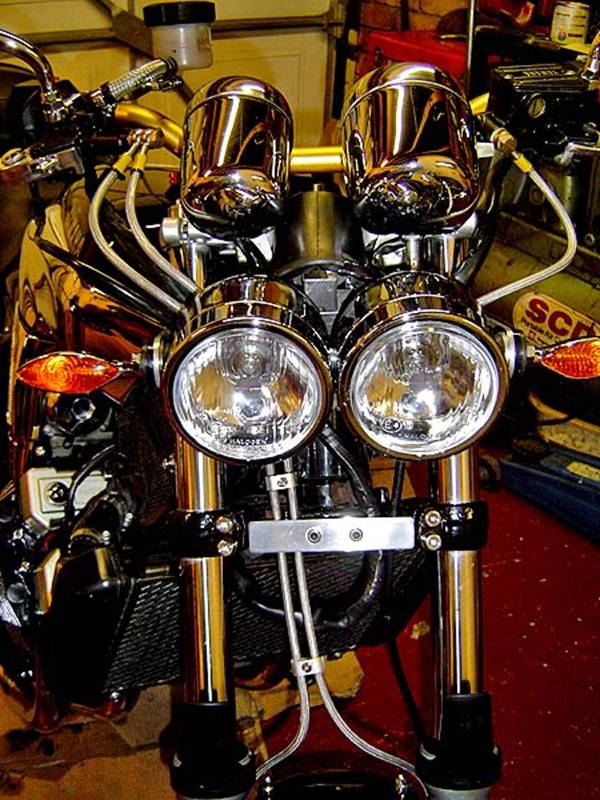
Above: the twin ‘Dominator’ headlights. A point worth considering about the headlights, is that now there are 2 lamps running on the system and thus drawing twice the current supposed to the one old square headlamp, will it have an adverse effect on the 20 year old wiring? I was anxious to see if the wiring got hot, so as soon as the lights were fitted, I reconnected the battery and started the bike up. Running it until the cooling fan came on, I kept a close eye on the wiring temperature where it enters the back of the light unit it. Even after 20 mins of running with the main beam on, the wires got no more than slightly warm and I think that’s only what was conducted back from the heat of the lights themselves…..these things get bloody hot!
After installing the lights, I was wondering what to do with the ignition switch which was now on full show between the two lamps. I didn’t look very pretty sitting there with all the wires spewing out of it and open to the elements. It needed a cover of some sort – but what? Then I remembered that when I bought the light brackets they came with 2 extra rubber mounts that go around the fork legs. One of them was split with a Stanley knife and opened up then popped over the switch to make the perfect bodge. It also double up as a protector to stop the clocks hitting the ignition switch and rattling.
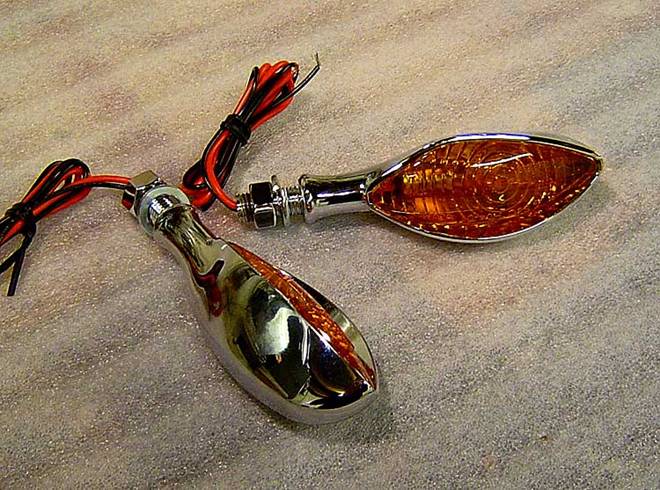
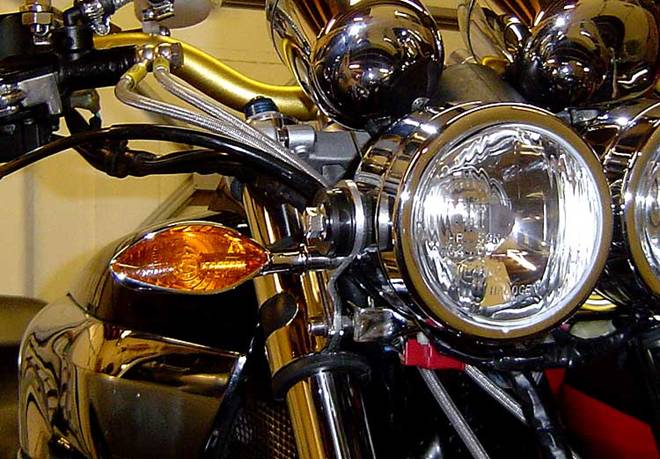
Next job was to fit some indicators. I looked everywhere for proper metal chrome ones, but all anyone seemed to sell was the cheap chromed plastic mini type. I was lucky enough to find a couple of pair of these (below) going for a very good price as a ‘buy it now’ on Flea bay. They really are a super bit of kit and they look the dogs danglies on the bike! I’ve just realised what an “E.Bay Tart” I’ve become! Sad eh/?
Note that the front brake& clutch lines are fitted in most of the above shots, these were put in as I was doing the lights and connecting up the wiring, but as yet they’re not bled through.
Above: the wiring and brake lines tidied up
Below: the brake lines & speedo converter connected to the front wheel.

Bleeding into dry brake lines is always a pig of a job, you can stand there for hours pumping away at the brake lever like a pair of out of control teenagers up a back jigger! I have better way! Pop down to your local pet shop and for a few bob buy yourself one of those syringe things for giving dogs liquid medicine. Shove a pipe on the end that’s a nice tight fit on both the syringe and the brake bleed nipple. Suck the fluid up from the bottle and then put the pipe onto the bleed nipple, slacken it off then start SLOWLY injecting the fluid back up the brake lines ‘til it appears into the reservoir – keep the top on it though because as it gets near the top it will spray everywhere!
You should now have brake fluid all the way through the lines so you can now bleed as normal. You will however now need some new fluid that’s been standing for at least 24 hours (to make sure it’s not aerated). What you now have to do is bleed through until all the fluid you’ve injected back up the lines is out – because that will be full of air with the injecting process. When you have a good solid lever – you’re done.
All that needs doing now is to tidy up a few bits and respray the bike, but one last thing before we go to the next page for all that crap……….the new mirrors. I love these, they really suit the bike and look far better than the round ones I bought earlier: